
The Promise vs. The Reality: The Instagram Lie
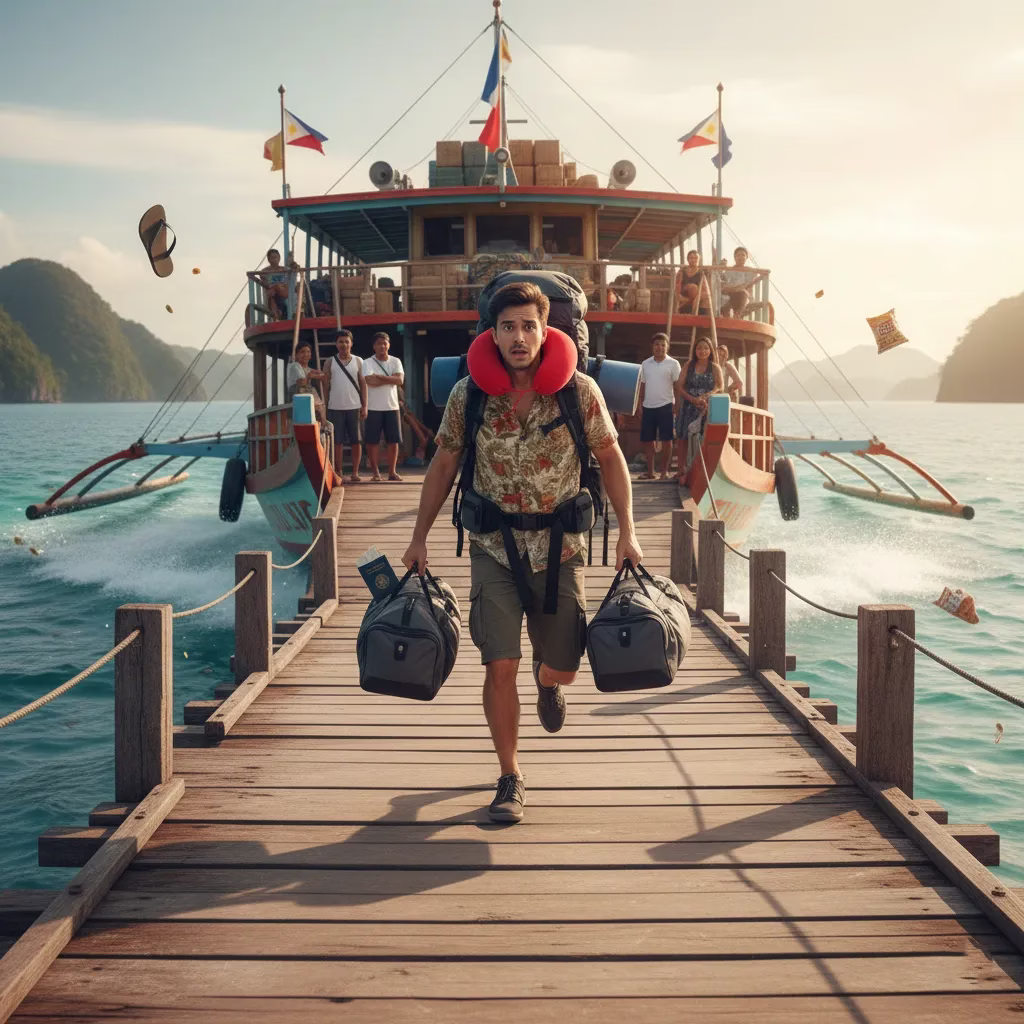
Close your eyes (well, after reading this) and picture the Philippines you see on Instagram: impossibly clear turquoise lagoons, powder sand that looks like baby’s breath, palm trees leaning dramatically toward the sea, and you—midair, mid‑splashes, mid‑bliss, the picture of a carefree traveler. That’s the promise everyone shows you. And let me start you out on the right foot from the very beginning: you’ll quickly learn that cash is essential in the Philippines. ATMs are scarce outside major cities, and credit cards are not widely accepted.
Now, open your eyes. Reality: you’ll be lugging your bag through a hot, humid terminal, waiting on delayed flights, hustling through narrow streets with unfamiliar signage, and sometimes sitting in a tricycle (motorcycle + sidecar contraption), praying the driver isn’t late for his next “joiner” ride. The Instagram version is true—but only in between all the logistical chaos that nobody shows you.
The contrast between the perfect paradise postcards and the sweaty behind-the-scenes is stark. If you go in expecting perfection, you’ll be disappointed when the boat is canceled, when the Wi-Fi is virtually nonexistent, or when your “quaint beach shack” is actually a bunk bed with a leaky ceiling and a fan that sounds like it’s about to take off. What nobody tells you—and what I’m here to spill—is that behind every hidden cove and jungle trek lies a basketful of travel headaches.
The 5 Hidden Truths Behind Paradise
If you’re planning your first trip to the Philippines, here’s the cold, unfiltered truth: enjoying paradise requires more grit than glamour. The postcard shots are real—and they’re on the other side of some wild travel realities. Your trip will hinge less on which island you choose and more on how well you navigate the logistical pain points: slow travel, cash in the Philippines is essential, connectivity issues, safety and etiquette, and cultural nuances.
We’re going to expose those hidden truths—so you don’t just arrive in paradise, but (mostly) survive it. After reading this, you’ll be armed not just with your sunblock and swimsuit, but with the streetwise smarts to hack your journey.
The “Island Time” Challenge (Logistics & Time)
The Slow Truth of Island Hopping
Ask five travelers what “getting between islands” means, and you might get five different answers. But here’s the honest one: traveling from A to B in the Philippines is rarely straightforward.
Imagine the route: you leave your resort, take a tricycle (or jeepney) to the local port, wait for the ferry or boat, endure the ride (which might include unexpected stops), then disembark, haul your bag, catch a van or jeepney to the bus station, perhaps take a land transfer, then finally get to your new destination. That’s often just one “hop.” Repeat that for each leg. What seems like a 2-hour distance can easily expand into a 6- to 8-hour travel saga.
Domestic flights (which are your shortcut option) are not the silver bullet many expect. They get canceled or delayed regularly. Airlines sometimes swap schedules without much notice. Why? Because “Filipino Time” is a real thing—things run on a more flexible timeline here, and few things are guaranteed. That 9:30 a.m. flight could end up leaving at 10:15 or 11:00. Alternatively, it could be canceled without much of an alternative being offered.
Ferry operators also tend to “adjust” schedules based on passenger load, sea conditions, or even whims. You might arrive at a port only to find that the boat scheduled for that time is postponed or replaced. During peak seasons or rough weather, boats get canceled altogether. Some locals wait for hours or even days for rescheduled trips. And remember: ports sometimes have only one or two crossings per day, especially on lesser-known islands.
So don’t expect seamless travel. Expect delays, allow for buffer time, and realize that your path from point A to point B will rarely be a straight line.
Impact on Itinerary (How Many Days Are Ideal?)
Given all that friction in movement, your dreamy “two-week whirlwind across Luzon, Visayas, and Mindanao” is ambitious—borderline reckless. If you try to cram too much in, you’ll spend more time in transit, frustrated at airports and ferries, than reclining on a beach with a book.
So, what’s realistic? Aim for 4 to 5 days per major region or island cluster. For instance:
- Palawan: 4–5 days in El Nido + 2–3 days in Coron (or fewer if you pick just one).
- Cebu/Bohol: 3 days Cebu city & beaches, 2 days Bohol and the chocolate hills.
- Luzon: If you want to see Banaue rice terraces, Sagada, and the beaches of the north, you’d need an entire week (or more) just in Luzon.
If your trip is only 10 days, consider focusing on one or two regions. Trying to tick Luzon, Visayas, and Mindanao in that span is an invitation to burnout.
Here’s a sample pacing guide for a 10-day trip:
| Day Range | Region / Focus | Activity Highlights |
| 1–2 | Arrival, Manila → Puerto Princesa (Palawan) | Recovering from jet lag, local city exploration |
| 3–5 | El Nido | Island hopping, beach lounging, and lagoons |
| 6 | Travel to Coron or back to Puerto | Movement day |
| 7–8 | Coron | Shipwreck diving, hiking Mt. Tapyas, and island tours |
| 9 | Return to Manila or fly to home base | Travel + souvenir run |
| 10 | Buffer / Departure | If delays happen, you won’t lose your whole trip |
If you tried to add Mindanao (say, Siargao) here, nearly every day becomes a “travel day.” Instead, focus your energy—and your precious time—on fewer areas. You’ll feel less rushed and enjoy each place more.
Practical Tip: Concentrate on One or Two Major Regions
Since hopping everywhere is more headache than heroics, here are some strategic region combo ideas:
- Palawan (El Nido + Coron) — You get the iconic lagoons and shipwreck dives without massive transfers.
- Cebu + Bohol — Easy connections, varied experiences (city, waterfalls, tarsiers, beaches).
- Siargao + Camiguin — A bit more offbeat, but doable for surfers and nature lovers.
- Luzon North (Baguio, Sagada) + Northern Beaches — Good for cooler climates, cliffs, and mountain treks.
Each cluster offers plenty to do, so you don’t have to turn every day into a logistics nightmare. And if you still feel FOMO about missing “that one island,” save it for next time. Last but not least, when thinking about cash in the Philippines, always remember that Cash is King! Working ATM’s are a rarity! You’ll appreciate your trip more when you’re not exhausted by travel.
Cash in the Philippines is King, ATMs Are Scarce
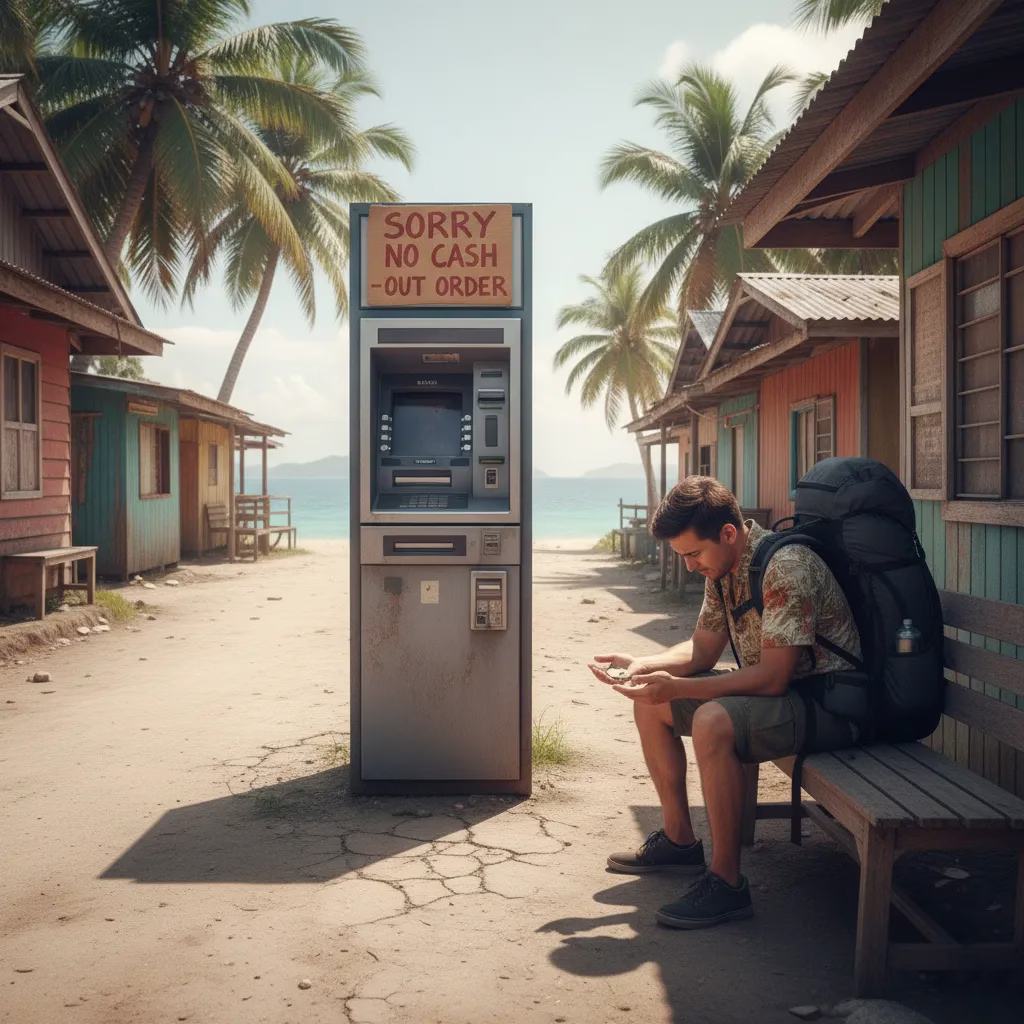
The ATM Drought: Remote Islands, Fewer Machines
One of the harshest shocks for first-time visitors is the disappearance of ATMs in many parts of the Philippines. Even when machines exist in small towns or on offbeat islands, they often run dry—cash is a necessity in the Philippines, it gets spent quickly, and resupply is intermittent.
Islands like Coron, many parts of Siargao, or remote beach towns may have just one or two ATMs—and they might not be operational, or they may be out of service altogether. There’s also the frequent frustration: the ATM works but refuses to dispense more than ₱5,000 or ₱10,000 in a single withdrawal. Or worse, the machine is broken, washed out due to humidity, or has electrical issues.
I once arrived in a quiet beach town after dark and found the lone ATM in the city out of order—no blinking lights, no error message, just dead. I had to borrow cash from a local in exchange for a digital transfer (which meant paying exorbitant mobile banking fees). Not ideal.
So never assume you can “pop into any corner ATM.” You can’t.
The Payment Reality: Cash-Only in the Philippines for Everything
Here’s another reality: in many places in the Philippines, cash is the only form of payment accepted. Don’t count on credit/debit cards outside of major hotels, resorts, and some restaurants.
You’ll frequently find that:
- Tricycles, jeepneys, and motorcycles are in need of cash.
- Small cafés, beach huts, food stalls, and sari-sari (small) stores won’t take cards.
- Local tour operators or boat rentals often expect cash up front.
- Market vendors and souvenir sellers will often reject cards or mobile payments for tourists.
You might see “We accept GCash / PayMaya / QR code” in more developed spots—but that still assumes you have Filipino e-wallet funds loaded (and these aren’t easy for a tourist to get).
If you arrive short on cash, staff might redirect you to the nearest ATM (which may be closed or out of order) or charge an extra fee for “card processing” (i.e., a markup). That extra markup is how some places “compensate” for not wanting to chase bank settlement fees.
Practical Tip: Withdraw Sensibly and Plan Carefully
To avoid being stranded with no money, here’s your emergency survival kit:
- Bulk Withdraw in Big Cities
Your best bet is to take out a large sum of Philippine Pesos (PHP) early on—when you’re still in Manila, Cebu, Davao, or another big hub. These ATMs are more reliable and are replenished more often. - Bring Backup Cash (in USD or a major currency)
Many currency exchange shops are located in central areas. Bring a small reserve in dollars just in case. You might exchange them at a local rate if your PHP runs dry mid-trip. - Stash Money in Multiple Places
Don’t keep all your cash in one wallet. Split it—some in a hidden pouch, some in your day backpack, some in your lodging safe (if available). - Estimate Your Daily Cash Needs
Before you hit an island, write down your rough daily budget: transport, meals, tours, tips. Multiply by days + 20% buffer. Withdraw accordingly. - Know When to Refill
If you’re island‑hopping, refill your cash before leaving each place—even if you still have some left. Don’t wait until you’re in a remote area to realize you have ₱100 and a ferry to catch. - Use ATMs Early in the Day
ATMs may run out of cash throughout the day. If you’re staying in a place with ATM access, consider withdrawing money early. Don’t wait until evening or the last minute. - Carry a Card That Has International Access and Minimal Fees
Use a debit/credit card that charges low or no foreign ATM fees (if possible). But don’t rely solely on it. - In an emergency, you can use a service like Western Union or MoneyGram
Learning the Hard Way
I have learned the hard way that unexpected emergencies will sometimes sneak up on you. In these cases, you may need to have some additional funds transferred to you through a service such as MoneyGram. I had to do this on occasion, and while it will work, it does require that you have prepared for it. I was fortunate because I had used MoneyGram in the past and had the app already loaded on my phone, which my bank recognized. However, in some smaller towns, this can still be a problem if the receiving location doesn’t have enough funds on hand to handle your transfer. They may need to obtain additional funds, which could take one to two days.
These strategies won’t make ATM droughts vanish, but they’ll drastically reduce the likelihood you’re stuck without pesos on a tiny island with no open ATM in sight.
The Connectivity Mirage
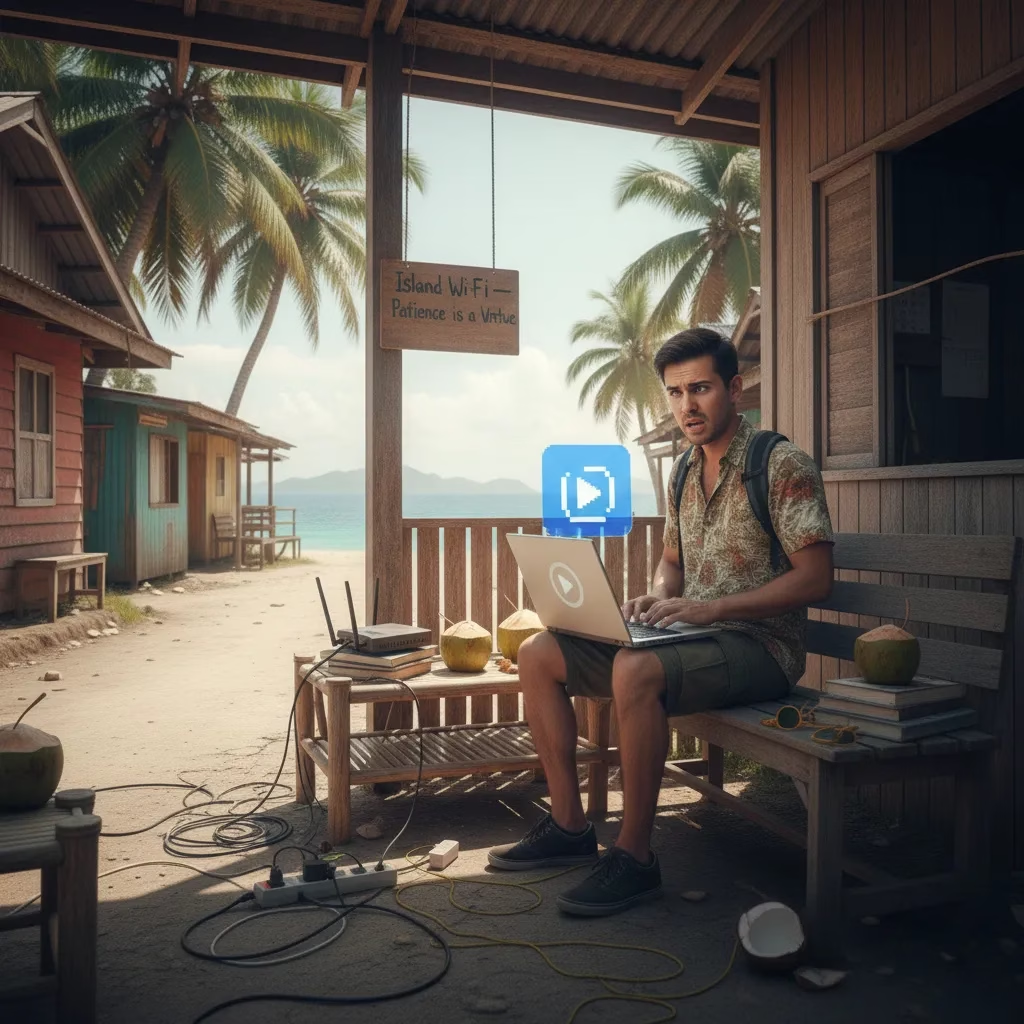
The Wi-Fi Myth: Hotel Internet Will Break Your Spirit
Let’s get this out of the way: don’t expect to work remotely from a beach hut in the Philippines unless your job description is “coconut inspector.”
Hotels—yes, even those that cost a decent chunk of your travel budget—will advertise “Free Wi-Fi” like it’s a luxury amenity. Spoiler alert: it often isn’t. The signal is either weak, slow, or entirely non-functional. Sometimes, it only works in the lobby. At other times, the network requires a password printed on a faded receipt, valid for exactly 42 minutes before expiring, much like Cinderella’s carriage.
Streaming? Forget it. Zoom calls? You’ll be frozen mid-sentence like an accidental meme. Even uploading Instagram stories can feel like trying to send smoke signals across the Pacific.
Cafés don’t always save the day, either. While some spots in cities like Cebu or Davao have decently reliable connections, the minute you step onto an island like Siquijor or into the mountain provinces, your upload speed slows to that of a sloth sipping halo-halo.
Mobile Data Is Your Lifeline
Now, for some hope: mobile data in the Philippines is surprisingly good in certain areas.
There are two big players: Globe and Smart. Both offer solid 4G LTE in urban centers, tourist hubs, and even in some rural areas. If you’re planning to use Google Maps, post photos, or make emergency bookings online, your SIM card will be your new best friend. Just don’t expect fiber speeds.
Globe tends to perform better in Visayas and Luzon, while Smart has a reputation for better coverage in Mindanao and more remote islands. However, this varies from place to place—ask locals what works best in the area you’re visiting.
Pro Tip: Download offline Google Maps of each area before heading out. You’ll thank me when your signal drops and you’re trying to find that one vegan café with two stars and a questionable smoothie menu.
Practical Tip: Get Your SIM at the Airport, Immediately
As soon as you land, do NOT make a beeline for baggage claim. Make a beeline for the SIM card kiosks instead. These airport booths (found at NAIA, Cebu-Mactan, and most international terminals) are your golden ticket to staying connected—and they’re actually cheaper than you think.
Here’s the game plan:
- Buy a prepaid tourist SIM from Globe or Smart.
- Ask for a data-heavy promo package (like GOMO, GoSURF, or UnliData plans).
- Load 10–15GB for starters—you can always top up later online.
- Ensure your phone is unlocked (i.e., not locked to your home service) before arriving in the country.
If you wait until you’re in a remote area to sort your SIM, you might face overpriced tourist bundles, outdated kiosks, or—worse—nowhere to buy one at all. The airport is easy, friendly, and hassle-free. Please don’t skip it.
Navigating Safety and Cultural Nuance
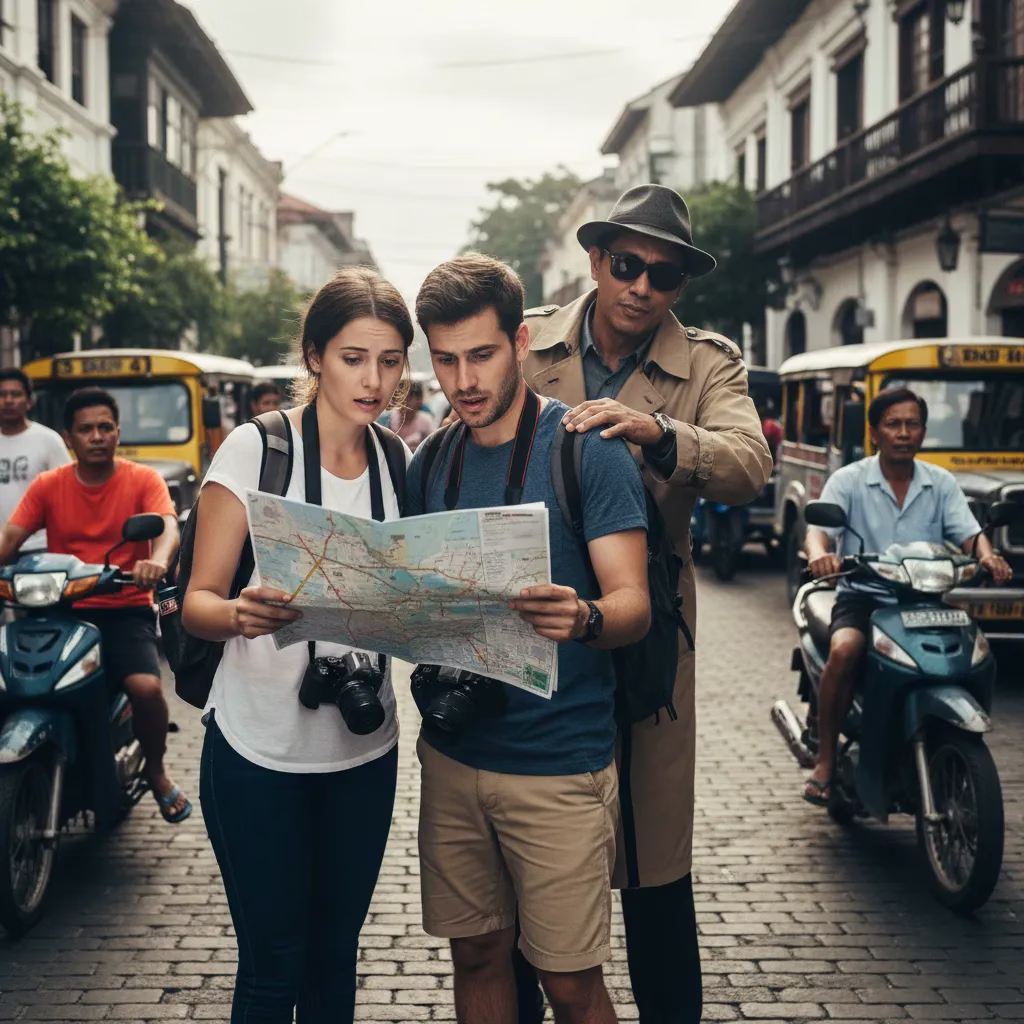
Is the Philippines Safe for Tourists? Let’s Talk Real Talk
So, here’s the spicy bit everyone wants to know but is often too polite to ask: “Am I going to get kidnapped, scammed, or worse?”
Relax. Breathe. For most travelers, the answer is: No. The Philippines is generally very safe. Tourist hotspots like Palawan, Boracay, Bohol, and Cebu are heavily patrolled, peaceful, and very used to foreign visitors. The most danger you’re likely to face is falling asleep on a hammock and waking up sunburned like a lobster.
But does that mean you should throw caution to the wind? Not quite.
Let’s get specific:
- Manila: Yes, there are areas of Manila (especially downtown or older districts) where pickpocketing and petty scams happen. Just like in New York, Paris, or Bangkok—keep your wits about you.
- Mindanao: Parts of this southern region are under travel advisories due to occasional insurgent activity. That doesn’t mean all of Mindanao is dangerous (Siargao, for example, is super chill); however, you should always check current travel warnings before venturing there.
- Common Scams: Overpriced tricycle fares, fake tour “guides,” sob-story beggars asking for transport, or food, money—these exist, but they’re more annoying than dangerous.
Tips to Stay Safe (and Chill):
- Avoid flashy jewelry or expensive camera gear on your person.
- Consider using ride-sharing apps like Grab instead of taking random taxis in Manila.
- Stick to well-lit, populated areas after dark.
- Don’t flash wads of cash when paying for your mango shake.
- Trust your gut. If something feels off—it probably is.
Tipping in the Philippines: Not Required, but a Power Move
No one’s going to give you side-eye if you don’t tip in the Philippines, but it makes you a hero if you do.
Here’s the breakdown:
- Restaurants: No obligation, especially if there’s a service charge already. But leaving ₱50–₱100 for good service will win you smiles.
- Tricycles / Jeepneys: Not expected. But rounding up helps everyone.
- Tour guides, dive masters, massage therapists: A little extra goes a long way—10% of the cost is generous and appreciated.
- Hotel staff: Leaving a tip for housekeeping or bellhops is classy and helpful.
In short, tipping isn’t as ingrained in the culture as it is in the US—but it’s appreciated and remembered. You’ll probably get better service next time, and maybe even a free mango on the side. Who doesn’t want a bonus mango?
The Real Prize in the Real Talk

So, here’s the truth: yes, the Philippines is paradise—but it’s paradise with potholes.
You’ll run into delays, dodgy Wi-Fi, cash freakout, and occasional miscommunications with tricycle drivers who seem to believe that when you requested “two chairs,” you actually meant a “city tour.” You’ll sweat, maybe curse a little, and wonder why you didn’t just go to Bali like everyone else.
But then—something magical happens.
You step into a lagoon that seems Photoshopped, so transparently. You’ll have a beer with locals who are so at home among each other that they treat you like the cousin they haven’t seen in years. Then, you’ll watch the sun dip down behind some palm trees in silence, completely present. And you’ll see: The struggles weren’t detours; they were the path.
All that chaos? Worth it. Every peso, every delay, every time you tried to order “pancit” and got “halo-halo” instead.
Now you know the real secrets. Now you’re ready. So book that flight and pack some patience for a trip as raw, real, and rewarding as it gets
What’s your biggest travel tip for the Philippines? Or your funniest travel fail? Drop it in the comments—let’s swap stories!
Final Notes: Embrace the Ding, and You’ll Find the Magic
Let’s face it — the Philippines isn’t the most user-friendly travel destination on earth. But it’s also one of the most rewarding.
You’ll become frustrated — with late ferries, sticky heat, and unhelpful hotel Wi-Fi. But in between all that, you’re going to have your jaw dropped by natural beauty; your heart melted by local kindness and goodness; and your phone filled with photos that you will not believe for the life of you were actually taken by — gasp — YOU!
So, pack your bags — along with additional patience, a willingness to make do, and some thousand-peso notes. Brush up on a few Tagalog phrases. And when things don’t go exactly as planned, smile and say, “Okay lang!” (It’s all good.)
Because after all, traveling the Philippines isn’t just about getting to paradise — it’s about laughing your way through the chaos to find it.
Quick-Fire FAQ (8 Things You’ll Want to Know)
Alright, rapid-fire mode. You’ve got questions, I’ve got answers — served hot, fast and also with a side of travel sass.
1. Do I need a visa to travel to the Philippines?
For most nationalities (including US, UK, EU, Canada, Australia), no visa is needed for stays up to 30 days. All you need is:
- A passport is valid for at least 6 months beyond your stay.
- Proof of onward travel (yes, they sometimes check).
Wanna stay longer? Once you’re in the country, you can also pay to extend your visa. The Bureau of Immigration even offers such 6-month extensions to those who fall in love with the islands (or a local).
2. Is the tap water safe to drink?
Short answer: NOPE.
Bottled or filtered water, unless you have a stomach of stainless steel conditioned by street food on six continents. Ice cubes? Be careful, especially in rural areas. Your stomach will thank you.
Even better, consider bringing a reusable water bottle with an integrated filter — for the environment and your health.
3. What are the top 3 islands for a first-time traveler?
If you’re a newbie to the 7,641-island party, make yourself heard with these bangers:
- Palawan – Known for its world-renowned lagoons, limestone cliffs, and simply stunning boating tours.
- Boracay – For perfect white sand, wild party nights, and sunset sailing.
- Bohol – For chocolate hills, little bug-eyed tarsiers, and unheralded beaches.
They all offer a perfect mix of chill, thrill, and “OMG, take a picture of me there!”
4. What’s the best time for weather (least amount of rain)?
Dry season = December to May. You should probably circle your calendar with little hearts and sunshine.
- December–February: Cooler, windy (ideal for sightseeing)
- March–May: Hotter, but ideal for island living
Stay away from June to November unless you are a fan of the random typhoons that come and rain-soak your sandals. And I know monsoon season brings moody skies (read: flights cancelled) and boat cancellations.
5. What is Filipino food like?
One word: SAVORY. Now five more words: Soy sauce. Vinegar. Garlic. Pork.
Filipino food smacks you in the face with hefty, powerful flavors. Must-try dishes:
- Adobo – Vinegar, soy, and garlic stewed meat, a national dish.
- Lechon – A whole pig that has been roasted. Crispy skin. Fatty bliss.
- Sinigang – Sour soup with a tamarind flavor.
- Halo-halo — A super-cold sweet treat that resembles the explosion of a unicorn in a cup.
Vegetarians, have hope — though it’s a meat-heavy recipe, yes, it’s not insurmountable (more below).
6. How difficult is it to find vegetarian and vegan options?
Challenge level: Medium-hard.
In less developed areas and in resort restaurants, it’s all very “chicken, pork or fish?” You will have to scavenge for veggie-friendly restaurants or request your food be made especially (in English, say “no meat”).
Tips:
- If you’re in tourist areas, check for Indian, Middle Eastern, or Western fusion cafes – they often serve plant-based options.
- Open the HappyCow app to help you locate vegan-friendly establishments.
Exercise saying: “No meat, eggs, or fish, please.”
7. Are there specific vaccinations that I need before I travel?
You don’t need a needle parade, but here’s what’s recommended:
- Routine vaccines (MMR, Tetanus, etc.)
- Hepatitis A and B
- Typhoid (especially if you are eating street food like a champ)
- Consider Rabies if you’re hugging every dog or monkey you see
Always check with a travel clinic before flying—especially if you plan to venture off the grid.
8. Can I speak to the locals in English?
Absolutely. English is widely spoken, particularly in cities and tourist destinations. In fact, it’s one of the two official languages (the other is Filipino).
From placing your order for food to haggling over tricycle fares or chatting about politics with the dude at your hostel, you’ll do just fine. Filipinos are also friendly and highly tolerant—you can get lost, and they will help you even if they don’t have a clear idea of where you need to go.
Other Articles that may be of Interest
You may also find the following articles interesting.
- Iloilo Itinerary for Seniors Who Love Culture and Cameras
- New to the Philippines? Your First-Timer’s Guide to Getting Lost (and Loving It)
Suggestions For Lodging and Travel
Lodging is widely available throughout the Philippines. However, you may want to consider getting assistance booking tours to some of the Philippines’ attractions. I’ve provided a few local agencies that we’ve found to be very good for setting up tours. For transparency, we may earn a commission when you click on certain links in this article, but this doesn’t influence our editorial standards. We only recommend services that we genuinely believe will enhance your travel experiences. This will not cost you anything, and I can continue to support this site through these links.
Local Lodging Assistance
- Guide to the Philippines: This site specializes in tours throughout the Philippines, offering flexibility in scheduling and competitive pricing. I highly recommend them for booking local arrangements for a trip like this one. You can book flights and hotels through the Expedia link provided below.
- Hotel Accommodations: I highly recommend The Manila Hotel for a stay in Manila. I stay here every time I travel to the Philippines. It is centrally located, and many attractions are easily accessible from there. Intramuros and Rizal Park are within walking distance. I have provided a search box below for you to use to search for hotels (click on “Stays” at the top) or flights (click on “Flights” at the top). This tool will provide me with an affiliate commission (at no additional cost to you).
- Kapwa Travel is a travel company focused on the Philippines. It specializes in customizing trips to meet customers’ needs.
- Tourismo Filipino is a well-established company that has been operating for over 40 years. It specializes in tailoring tours to meet customers’ needs.
- Tropical Experience Travel Services – Tours of the Philippines: This company offers a range of tour packages, allowing you to tailor your trip to your preferences.
Lastly, we recommend booking international travel flights through established organizations rather than a local travel agent in the Philippines. I recommend Expedia.com (see the box below), the site I use to book my international travel. I have provided a search box below for you to use to search for flights (click on “Flights” at the top) or Hotels (click on “Stays” at the top). This tool will provide me with an affiliate commission (at no cost to you